Pricing Section
The Pricing section displays pricing tiers or product plans in a clean card layout. Perfect for presenting your offers.
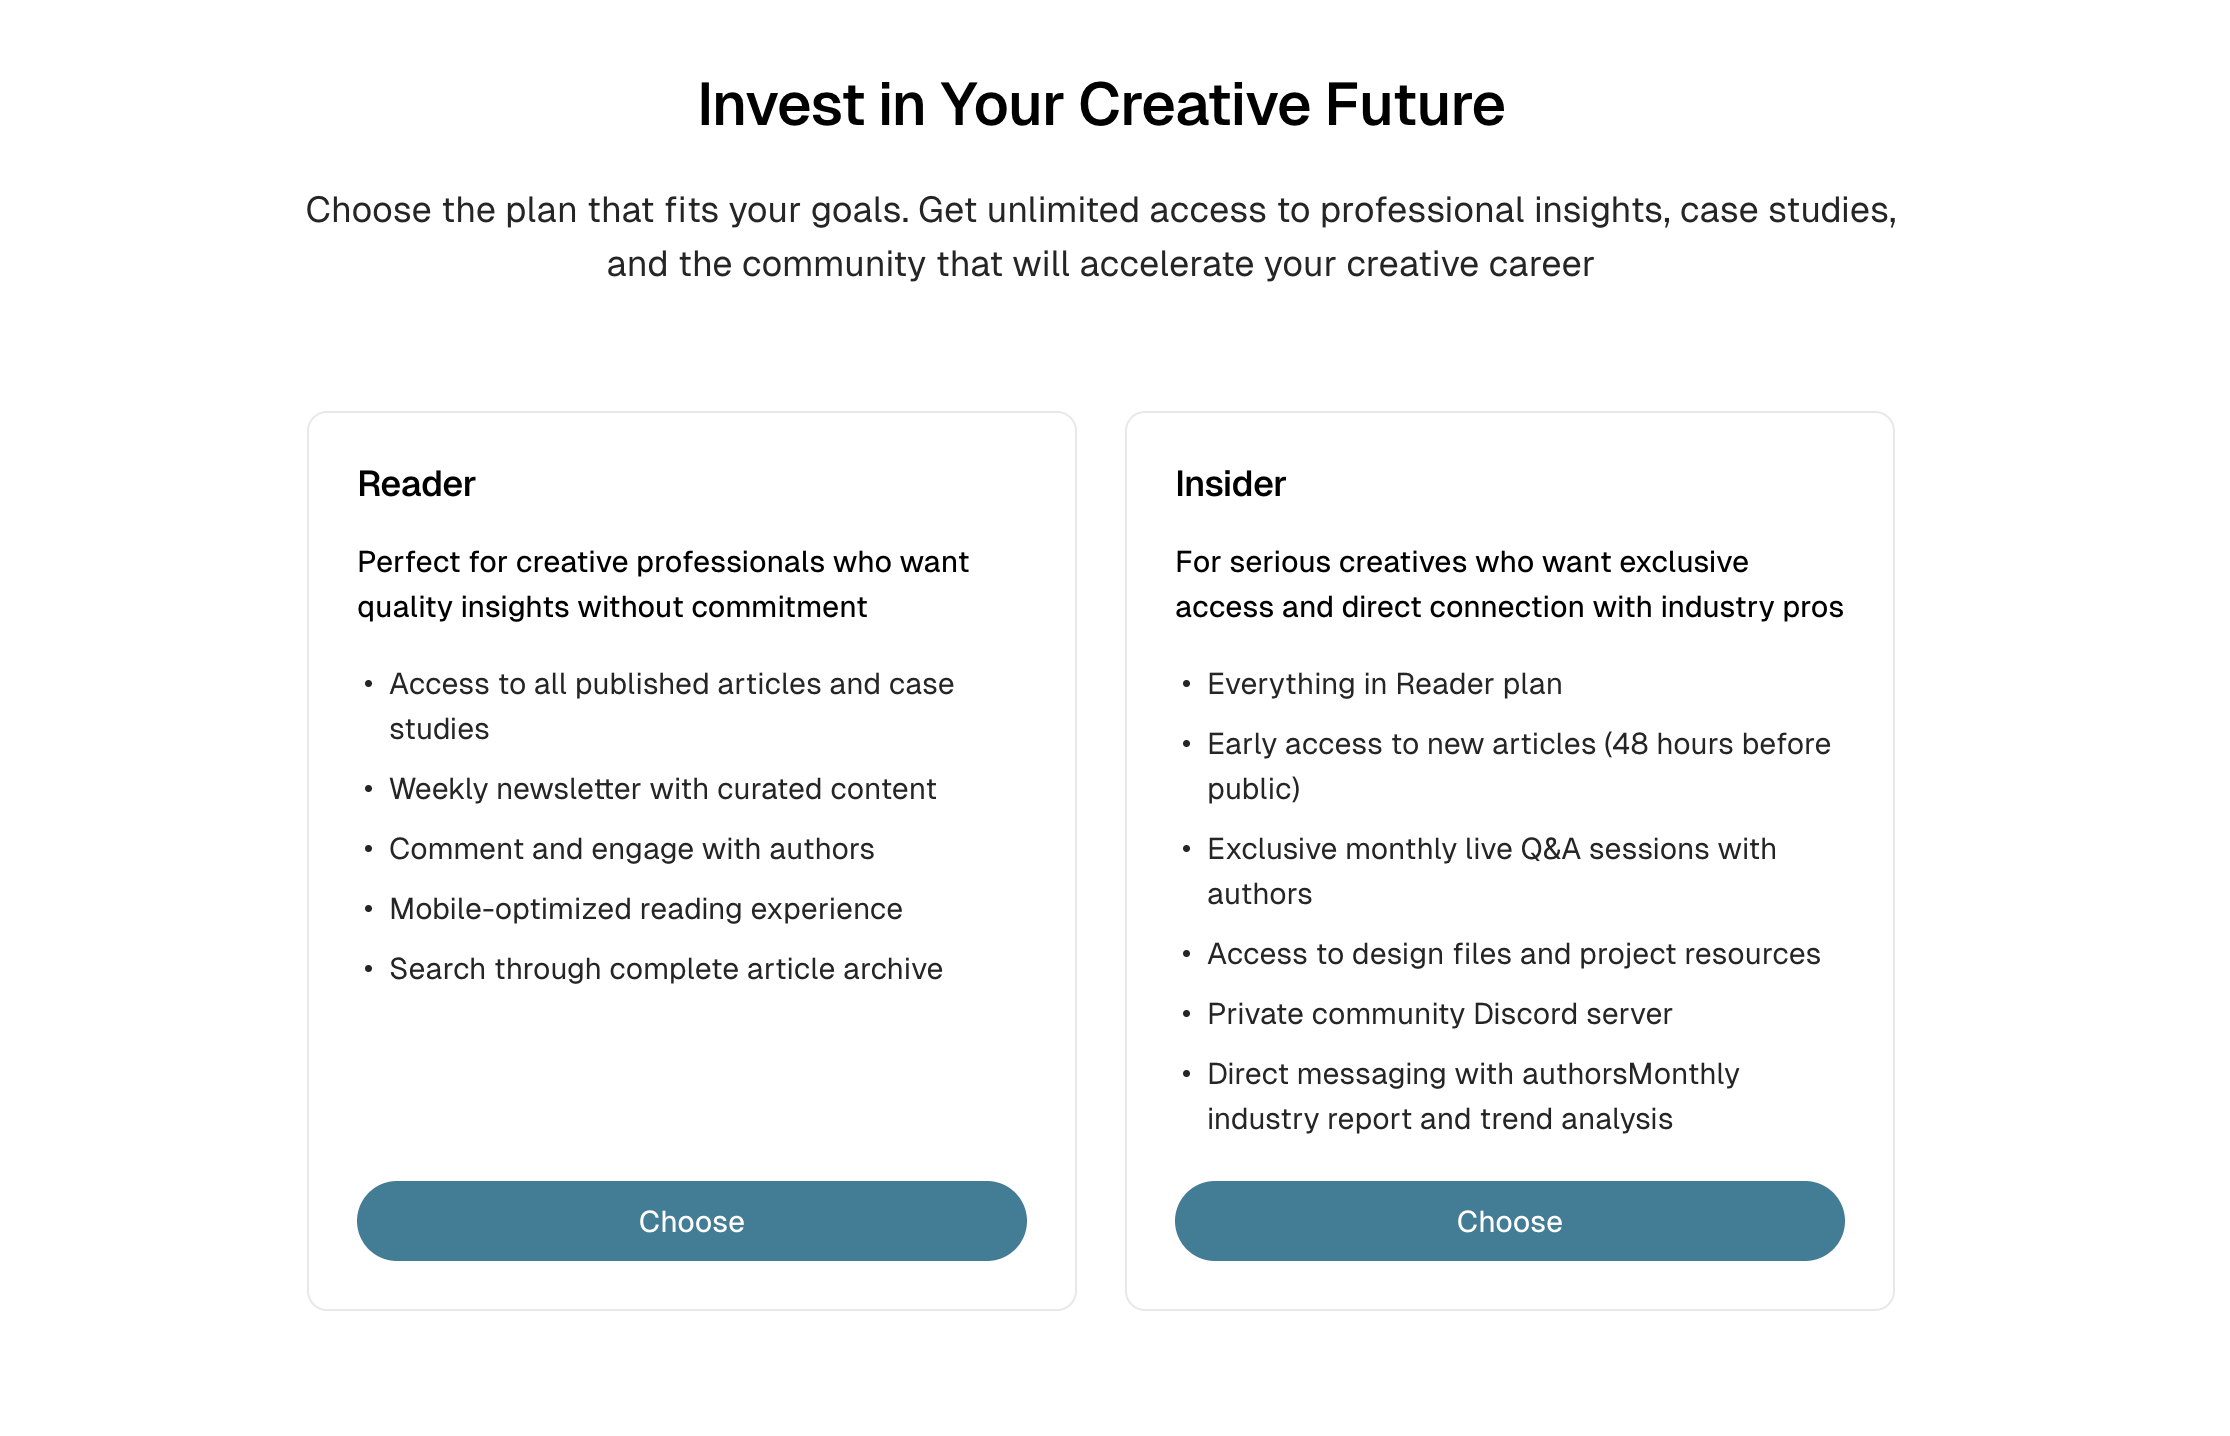
Creating a Pricing Section
- Log in to Ghost admin
- Go to Pages, click New page
- Set the Page title (e.g., “Choose Your Plan” or “Pricing”)
- Optionally add an Excerpt for a section description
- Add pricing cards to the content (see structure below)
- Open the Page settings sidebar
- Add these internal tags:
#landing,#landing-pricing - Click Publish
Required Tags
| Internal Tag | Description |
|---|---|
#landing | Required for all landing sections |
#landing-pricing | Enables the pricing cards layout |
Column Options
Control how many pricing cards appear per row:
| Internal Tag | Columns | Best For |
|---|---|---|
#landing-columns-2 | 2 columns | Two main plans (e.g., Free/Pro) |
#landing-columns-3 | 3 columns | Three-tier pricing (most common) |
#landing-columns-4 | 4 columns | Multiple product tiers |
Example: 3-Column Pricing
#landing
#landing-pricing
#landing-columns-3
Adding Pricing Cards
Add pricing tiers using Product Cards:
- Click the
+button in the editor - Select Product
- Add a Title for the plan name (e.g., “Free”, “Pro”, “Enterprise”)
- Add a Description with the price and plan details
- Add a Button with a link to the signup/purchase page
- Repeat for each pricing tier
Integrating with Ghost Portal
Link your pricing buttons directly to Ghost Portal:
| Action | URL |
|---|---|
| Free signup | #/portal/signup/free |
| Paid signup | #/portal/signup |
| Account login | #/portal/signin |
| Account page | #/portal/account |
If you use Ghost Members/Portal, these links can open the signup/signin/account flows without needing a dedicated theme page.
Optional Settings
Combine with other settings:
| Internal Tag | Effect |
|---|---|
#landing-hide-title | Hide the section heading |
#landing-container-wide | Wider pricing layout |