Routes Setup
To upload the routes.yaml follow these steps:
- Unzip the onflow.zip theme file
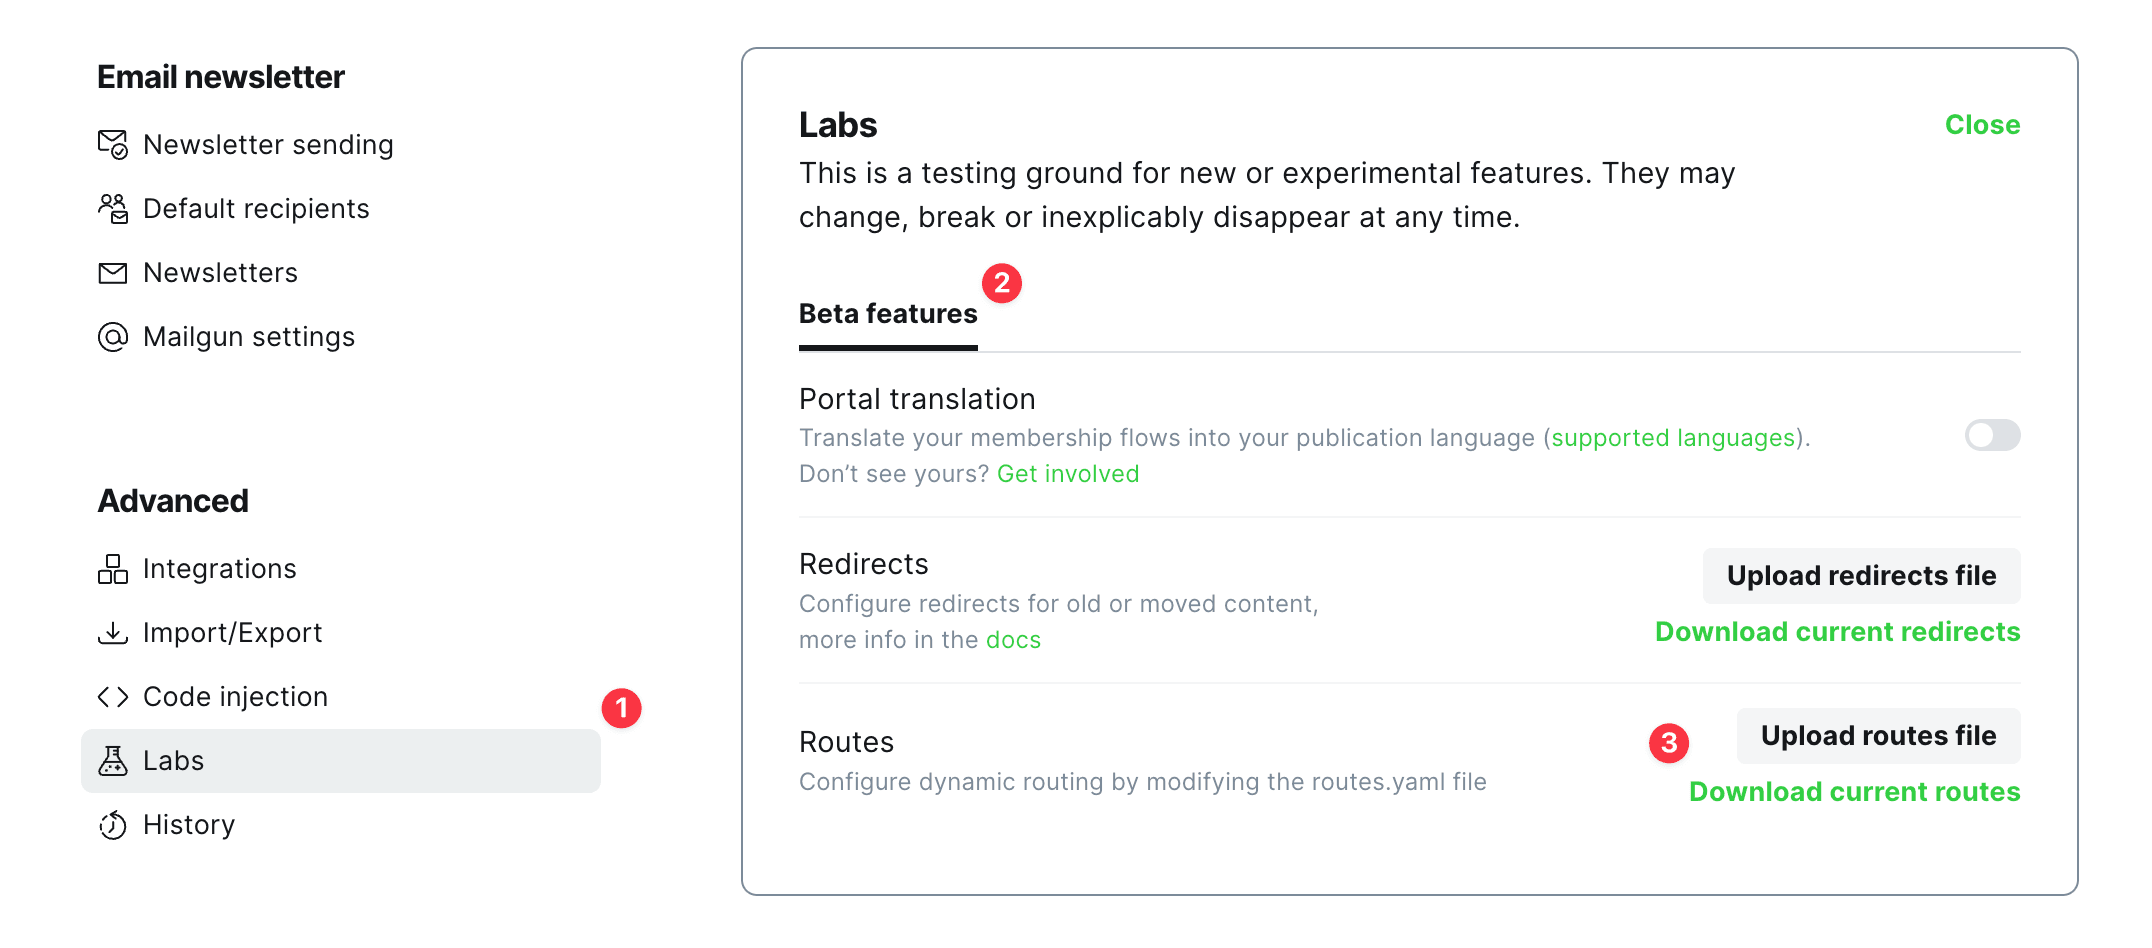
- Go to Settings → Advanced → Labs
- Click Open → Beta features
- Under Routes section, click Upload routes file button
- Select and upload the
routes.yamlfile from the theme folder
Note: upload routes.yaml after uploading the theme zip.
There will already be a default routes.yaml file uploaded to Ghost. You must upload your theme’s routes.yaml to override the default.
Do this separately after uploading your theme zip file.
The routes.yaml is required to properly map the custom routes provided by the theme:
/writings/- List of all posts/projects/- List of all projects/signup/- Sign up page/signin/- Sign in page/tag/*/- List of all posts with the tag/author/*/- List of all posts by the author and author’s bio
Custom Pages Data
Our theme provides a few custom pages. However, to modify the page title, image, excerpt, and content, you need to activate the data property. To do so, you must remove the # symbol in front of the data property in the routes.yaml file. Then, create the page with the correct slug that you wish to control.
Important: If you do not uncomment the data property in routes.yaml and upload the file to Ghost, the custom page will not use your page title, feature image, or excerpt. It will use the default theme settings.
For instance, if you want to manage the /projects/ page, create a page with the slug projects. After that, fill in the data property in the routes.yaml file:
collections:
    ...
    /projects/:
        permalink: /projects/{slug}/
        filter: 'tag:hash-project'
        template: projects
        data: page.projects # When active data will be taken from the  "/projects/" page